I assign a minimum lifespan to things I want to own. This habit helps me calculate how much budget I can allocate for them, understand whether that thing comes cheap or expensive, and whether it’s worth it.
My 6-year-old Alienware laptop was a bit of a disappointment for me. I wanted it to be something I could game on at home, code on, and also be my portable computer. I also wanted to be able to increase RAM and SSD capacity when needed in the future. None of my expectations were met satisfactorily. It was hard to carry, the charger was like a brick. The battery swelled twice and I had to replace it. Upgrading any hardware was difficult - those curious should definitely check out Alienware 15 R3 battery replacement videos.
Despite everything, it served me for 6 years. Now it will continue to serve for my daughter’s education and gaming. Now I know better what I want, and I’m sure it’s not a laptop. I thought about Steam Deck for a long time. A system I’m sure works properly with Linux, developed for gaming, and a portable device I can use as a desktop computer. But I could never be sure I could use it for a long time.
Then I researched Mini PCs. I’ve seen a lot of Mini PC setups shared thanks to Omarchy lately, and they’re all beautiful. But when you wanted to make the hardware a bit better, the price became as expensive as building a mini-ITX case.
Buying and assembling computer parts from scratch is a troublesome job. When I looked at ready-made setups, I either had to pay for a part I didn’t like, or it was more expensive than I expected. Therefore, I decided to choose all the parts myself and prepare the machine myself. This also had its risks: parts not being compatible with each other, lack of Linux support, the possibility of any part arriving broken, bottlenecks, learning the features of almost all parts and extra effort to assemble them.
I took this risk. While reading my steps, you may witness my amateurism. I’ll summarize what I learned afterwards.
Starting Small: Case
Honestly, I wasn’t sure I was making the right start, but I wanted to first determine what kind of case I wanted to see on my desk. At first, I thought about so-called sandwich cases, where the graphics card and motherboard are mounted back-to-back like a sandwich. But I encountered too many handicaps. I had too many questions in mind like how heat management would work, whether I could install the graphics card I wanted, whether I could organize the cables, which power supply would fit this.
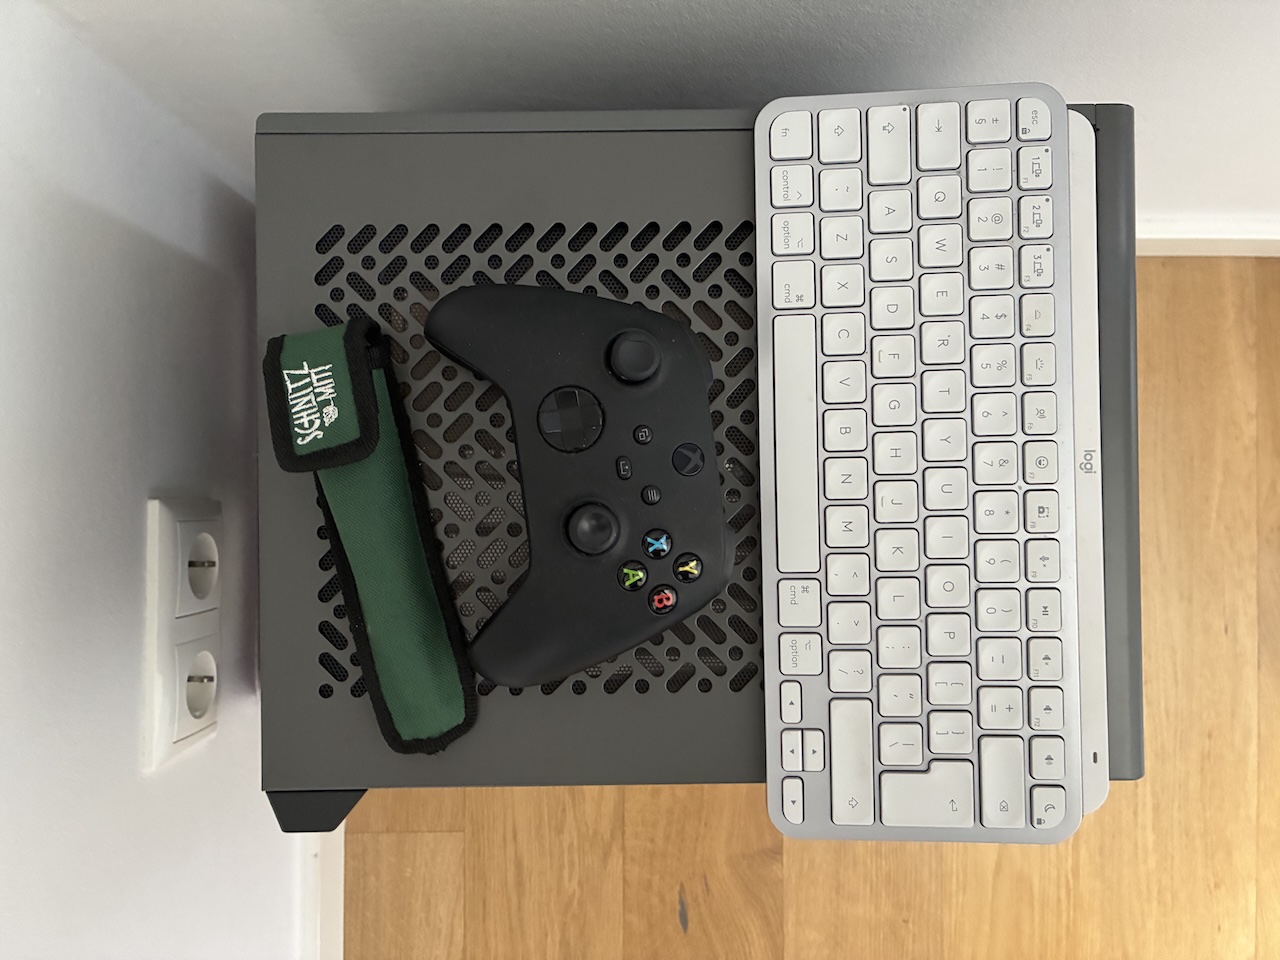
Later, on my friend’s advice, I researched the Cooler Master NR200P and really liked it. I didn’t have very specific requirements for fans and cooling systems. Therefore, I preferred the NR200P V2 Max model, which has two fans at the top exhausting heat, a liquid cooler for the processor, and an 850W PSU.
When it arrived, I was genuinely surprised by how compact it was. I knew the dimensions, of course, but seeing it next to my keyboard really drove home just how small this build would be.
The Overwhelming Cable Management Reality
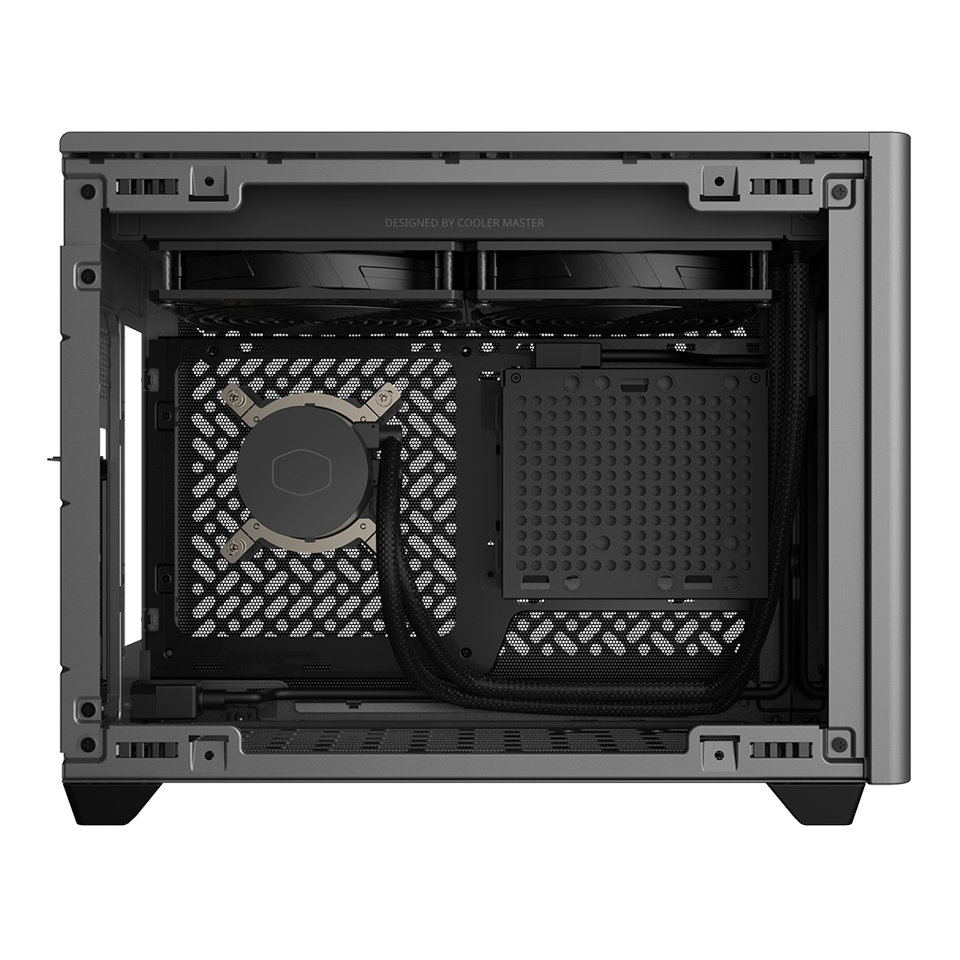
Now that I had a clear framework in hand, my mind was somewhat relieved. Now I can start by buying a motherboard, I said. The processor would be AMD, it shouldn’t be too expensive or too old. Having two memory sockets, one graphics card, and one NVME SSD slot was enough for me. I preferred ASRock B850I.
I hadn’t anticipated that mounting the motherboard to the case would challenge me this much when no other parts had arrived yet. I was placing orders one by one and as soon as parts arrived, I couldn’t help myself and immediately started assembly. Inexperience! Also, cables seemed so big to me that I struggled quite a bit to understand what to plug where. After finishing the setup, I couldn’t understand why I panicked so much. It turns out it’s almost impossible to plug some cables wrong or backwards. All I had to do was calmly read the installation booklet.
CPU
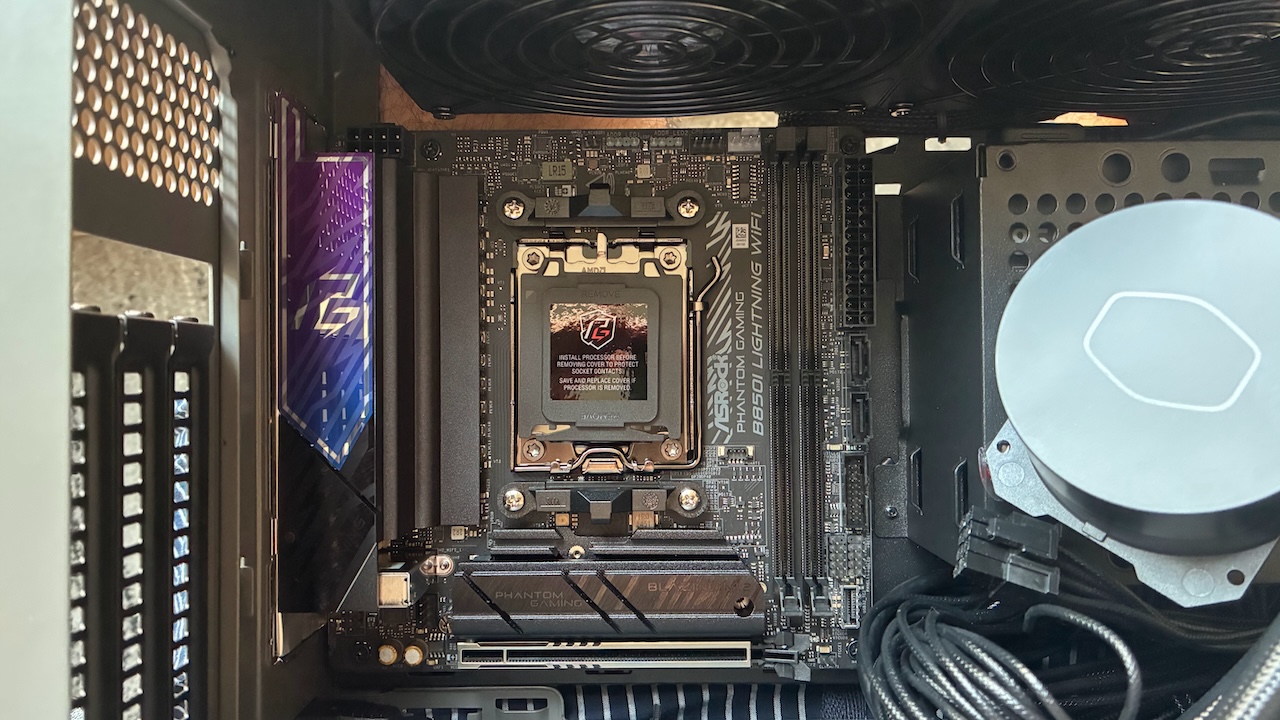
My next order arrived: AMD Ryzen 9 9900X. Actually, I was thinking of buying the Ryzen 7 series, but when there was a discount, I found it more economical compared to the 7 and bought the 9. I realized later that this was a wrong decision. I should have considered not only the price but also energy consumption and heat management. I’m not sorry, but it was an unnecessary investment. The 7 would have been enough for me.
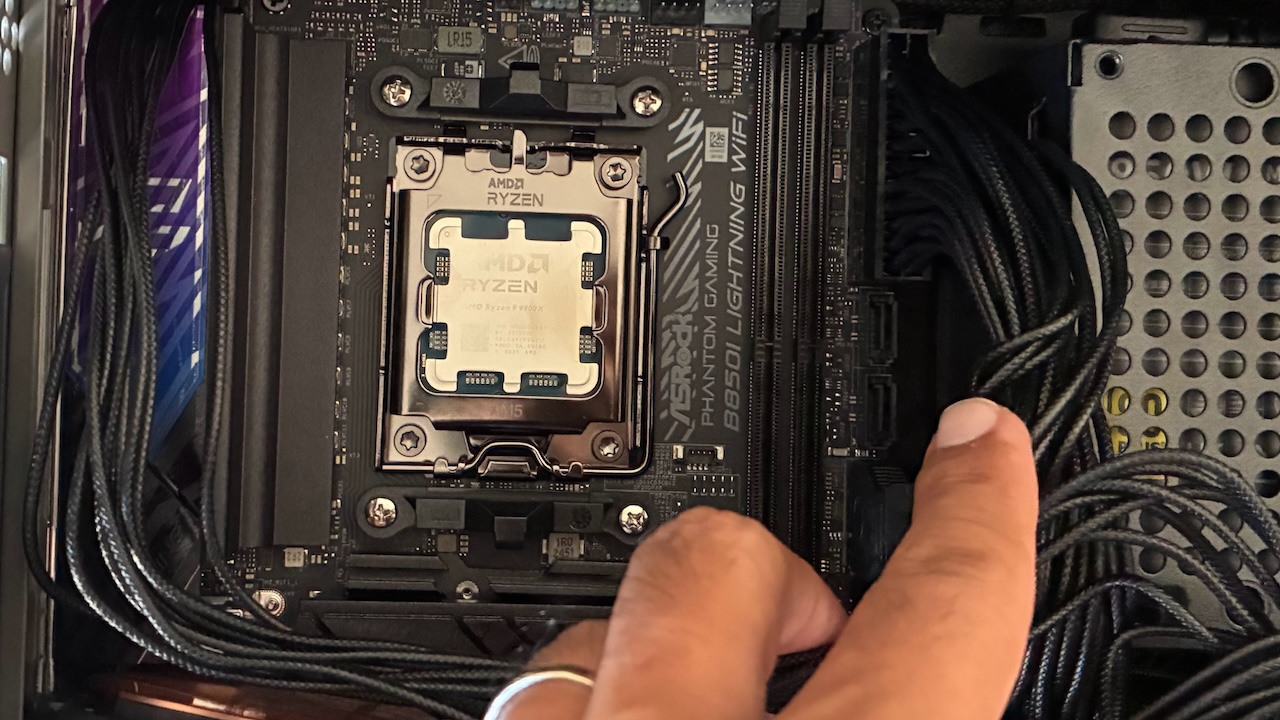
After installing the processor, I immediately mounted the cooler that came with the case, plugged in the cooler and fan cables, and waited for my next order to arrive.
Memory and Storage: The Easy Wins
A total of 64GB, two Crucial Pro DDR5 RAM sticks and a P510 SSD from the same brand were the next parts to arrive.
When choosing RAM, I paid attention to data transfer rate and storage capacity. 5600 MHz is sufficient for games, but I thought it would be useful to be able to reach 6400 MHz thanks to AMD Expo technology for my AI works.

Similarly, I paid attention to read/write speed on the SSD (10000/8700). 2 TB storage probably won’t be enough, but my motherboard allows me to install more SSDs and HDDs.
First Run for Testing
Now I could install the operating system and check if everything was working properly. I installed Arch Linux. I could write a different post about the installation, but I’d like to briefly mention this: Arch Linux has become a system that’s easier to install after all these years! Moreover, thanks to distributions like EndeavourOS, Manjaro, Omarchy that are very easy to install, you don’t have to do step-by-step installation from the terminal.
After installing the system, I activated AMD Expo for faster memory data transfer rate and checked whether the amdgpu kernel module was working correctly for integrated graphics. My first impressions were very good.
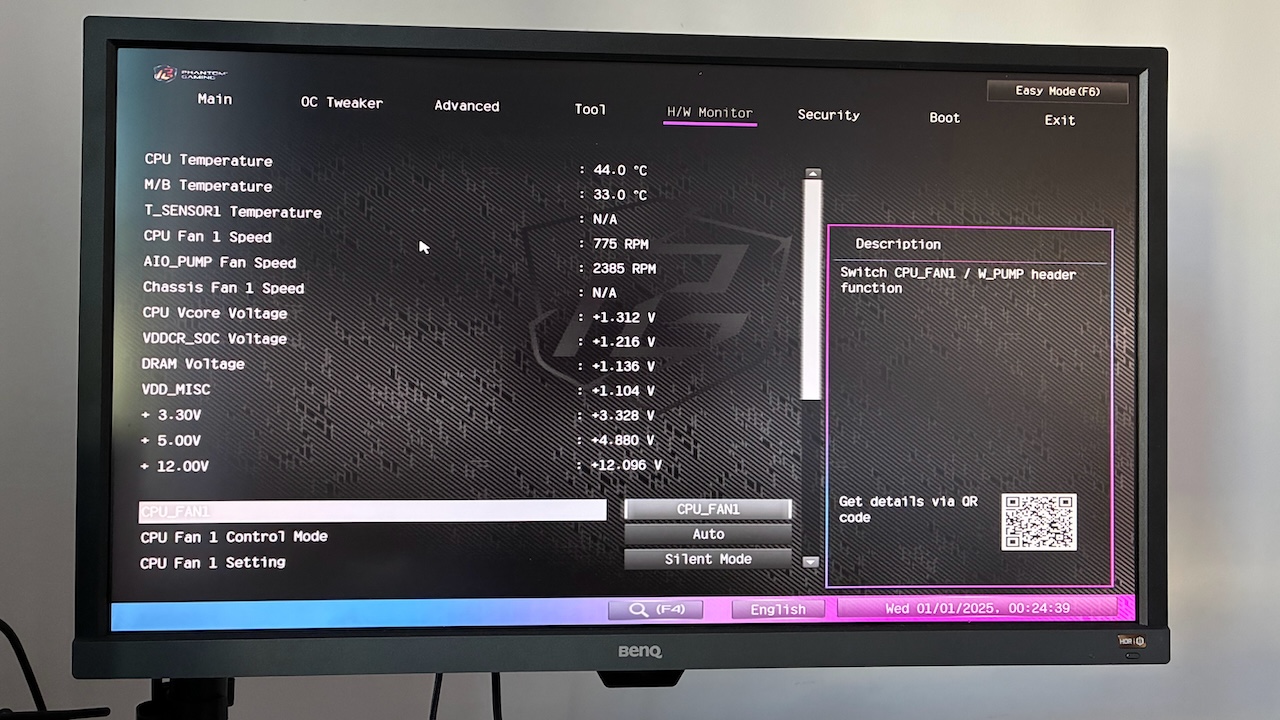
I even played a few games with low graphics system requirements on Steam and they worked very well. However, the screen freezing for a second or two bothered me, and I started researching what the reason could be for a long time.
The dmesg and journalctl outputs were full of error outputs related to the amdgpu kernel module, but I couldn’t find anything about the solution. I tried different kernels, looked at BIOS settings, but to no avail. It didn’t always happen, but when it did, it bothered me. For now, this problem was temporarily solved by buying a graphics card and disabling the integrated card.
The Fan Dilemma: Function vs. Form
As far as I observed, there was no problem with the system, but when I noticed that there was nothing to provide cold air intake, I bought two Noctua NF-A12x15 fans for the bottom of the case. I planned for cold air to enter from the bottom of the case and hot air to exit from the top. My first assembly was both very difficult and looked terrible.
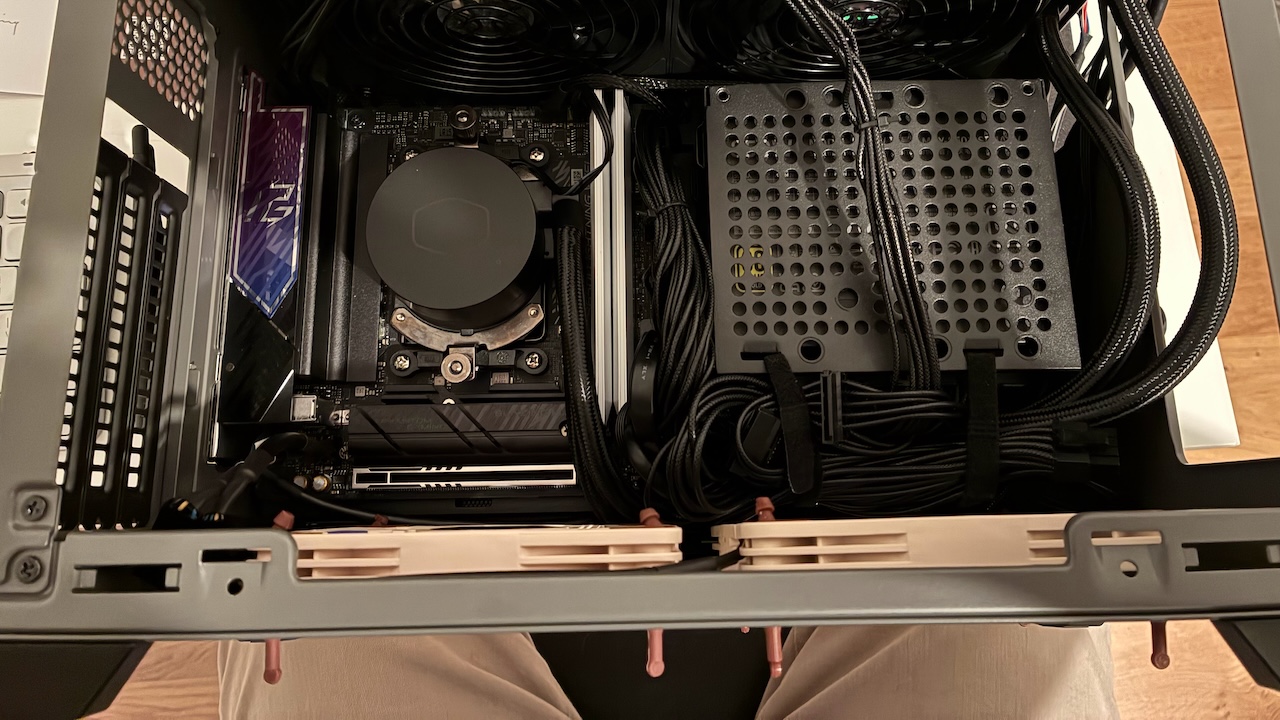
The biggest feature of the brown mounting kit used instead of screws was to prevent vibration and noise, but it stood high and there wasn’t much space for the graphics card inside the case. I also couldn’t install the gray dust filter. Therefore, I used screws later. There was no disturbing increase in noise and vibration.
I didn’t like that the RAM was white, I couldn’t find the black color. Similarly, I couldn’t find the black color of Noctua fans. I didn’t worry about these too much because the inside isn’t visible anyway after closing the case. But for those who care about appearance, incompatible colors will be a bit disturbing, I noticed that.
Now that only the graphics card was left, I started to gradually secure the cables. I needed to make sure that no part would move when I had to move the case.
The Final Component: GPU Installation
I couldn’t decide whether it was the hardest or easiest to assemble. I realized how important cable organization was when installing my NVIDIA RTX 5080 graphics card. If the cable passed in front of the card, it would block the fan; if it passed from behind, the length wasn’t enough; if you extended the cable, there was a possibility of it getting caught in the fans below. I wasted quite a bit of time with this. But after organizing the cables, the rest was really very easy.
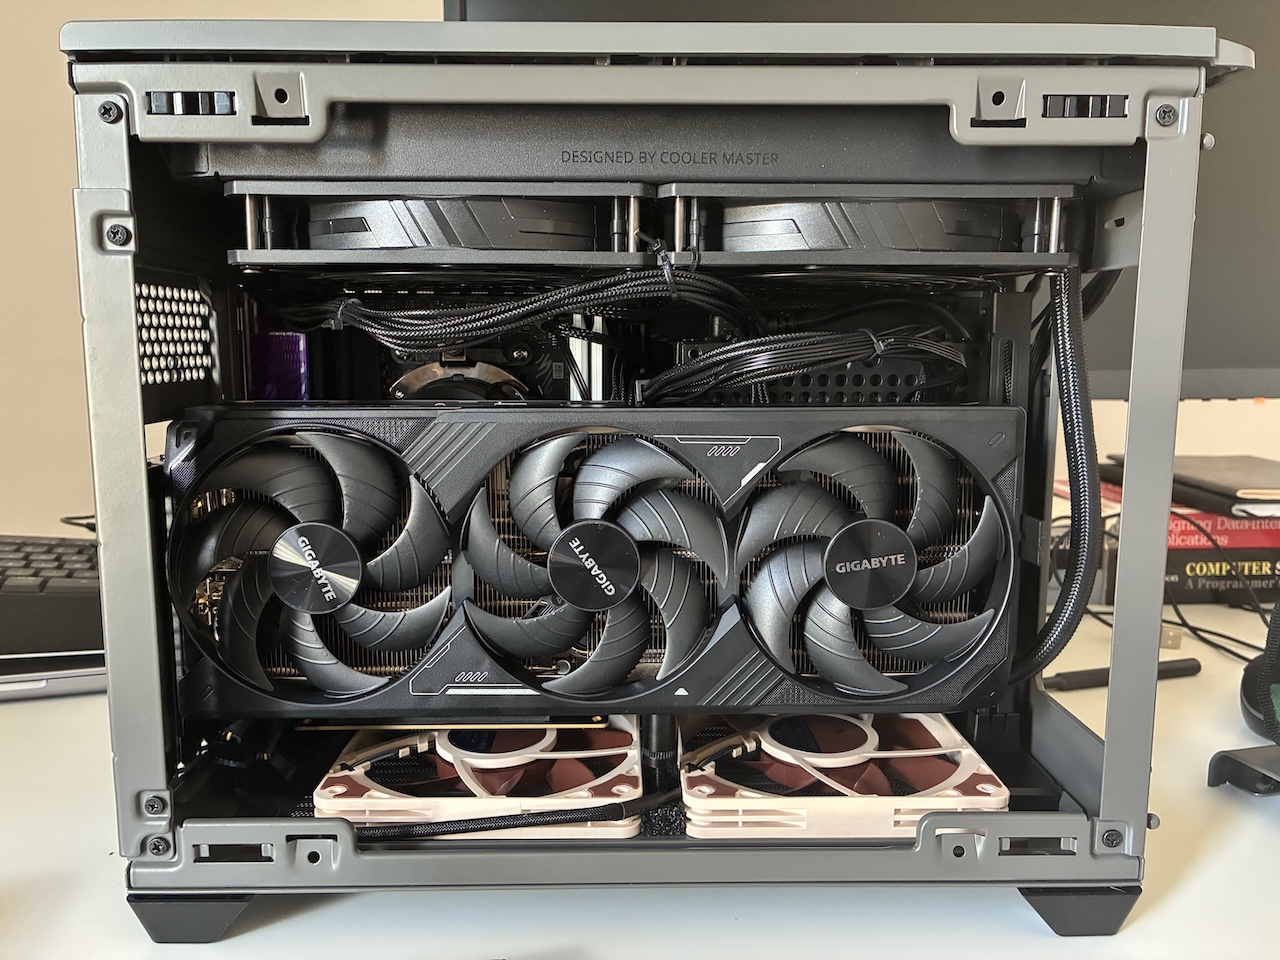
I used both the card support brackets that came with the Cooler Master case and the graphics card together. After finishing the assembly, I closed the case. I disabled the integrated graphics card from BIOS settings and installed the necessary NVIDIA drivers. For a long time, I did my tests with both games, Ollama, and the ray tracing application I wrote myself. All fans are working as I want, temperatures are at the level I expected, and there are almost no problems. Everything is working as I want.
Living with the Imperfections
Even now, looking at photos of the finished build, that one fan cable still catches my eye. But everything is mounted securely and won’t budge. At this point, my only hope is that this setup will serve me well for at least the next 10 years.
Lessons Learned
- When buying the case, I should have calculated whether the 850W PSU would be enough for me. When I want to update my graphics card in the future, I’ll probably have to buy a PSU as well.
- Trying to mount other parts after mounting the motherboard to the case was very difficult. It would definitely have been easier for me to wait for all the orders. Memory, SSD, and CPU should be mounted to the motherboard first, then the motherboard should be mounted to the case.
- Sometimes parts change for various reasons like price, delivery date, whether they’re in stock, second-hand, etc. When they change, you need to recalculate some things from the beginning. For example, at first I had in mind to buy AMD Ryzen 7, when the price of 9 dropped, I bought it without thinking, but I remembered much later that 9 consumes more energy than 7.
- Even if you know what you’re going to do before starting assembly, it’s useful to definitely look at the booklet. Plastic protections on parts that need to be removed make themselves quite obvious, but it’s still useful to be very careful. You don’t want to forget and find them melted from heat inside.
Building a PC after six years reminded me why this hobby is both frustrating and rewarding. The technology has evolved, form factors have gotten smaller, and cable management remains the eternal struggle. But there’s something deeply satisfying about assembling your own machine, knowing every component and connection intimately.
Here’s to the next decade of computing – may this little powerhouse prove as reliable as the Alienware that came before it.