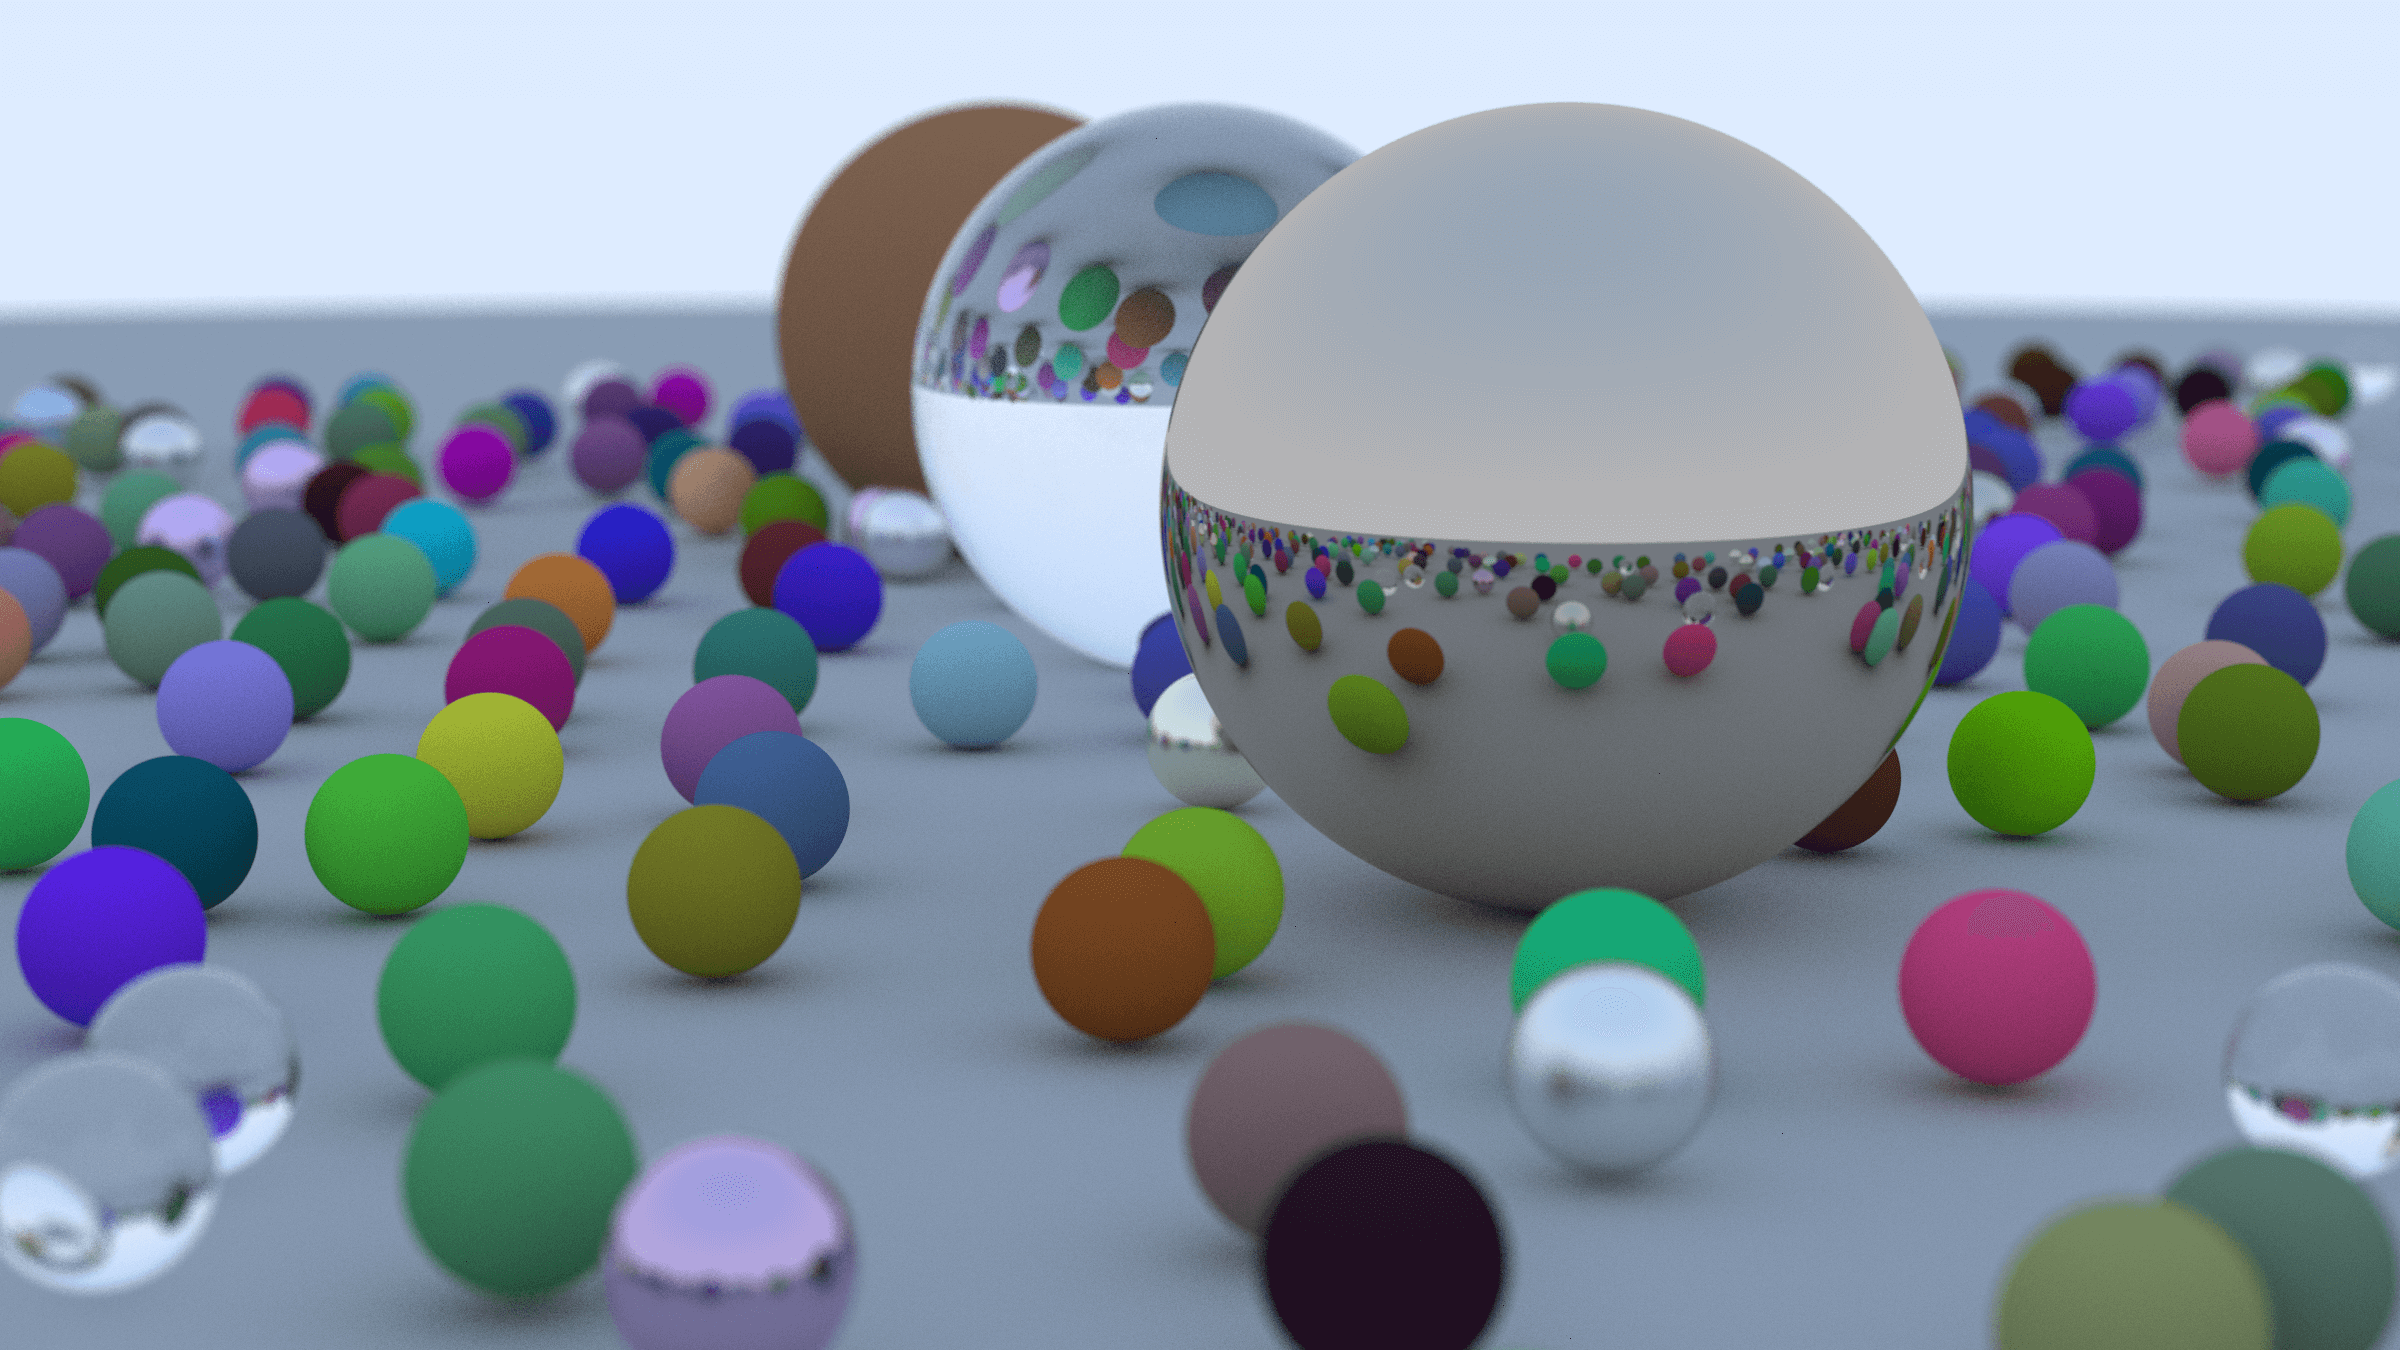
A few years ago, to better understand ray tracing, I read the book Ray Tracing in One Weekend. The original code samples were in C++, and as I read, I was translating and writing them in Python. Yes, I knew from the start that it was a terrible idea, but I was curious. One of the best ways to observe Python’s performance inadequacy is to test the ray tracing algorithm by generating an image with a width of 1000 pixels. But even 300 pixels takes a lot of time. Therefore, you resort to alternative solutions such as interoperability, multiprocessing, or GPU usage. This appeared as a fun and extra task that I had to solve while learning ray tracing.
The code is in the GitHub repo, you can download and use it from the terminal. You can also try it on Hugging Face Spaces; but if you want to test it with GPU, you need to fork the repo and run it on a server with a GPU. There are a few topics I want to share about this work:
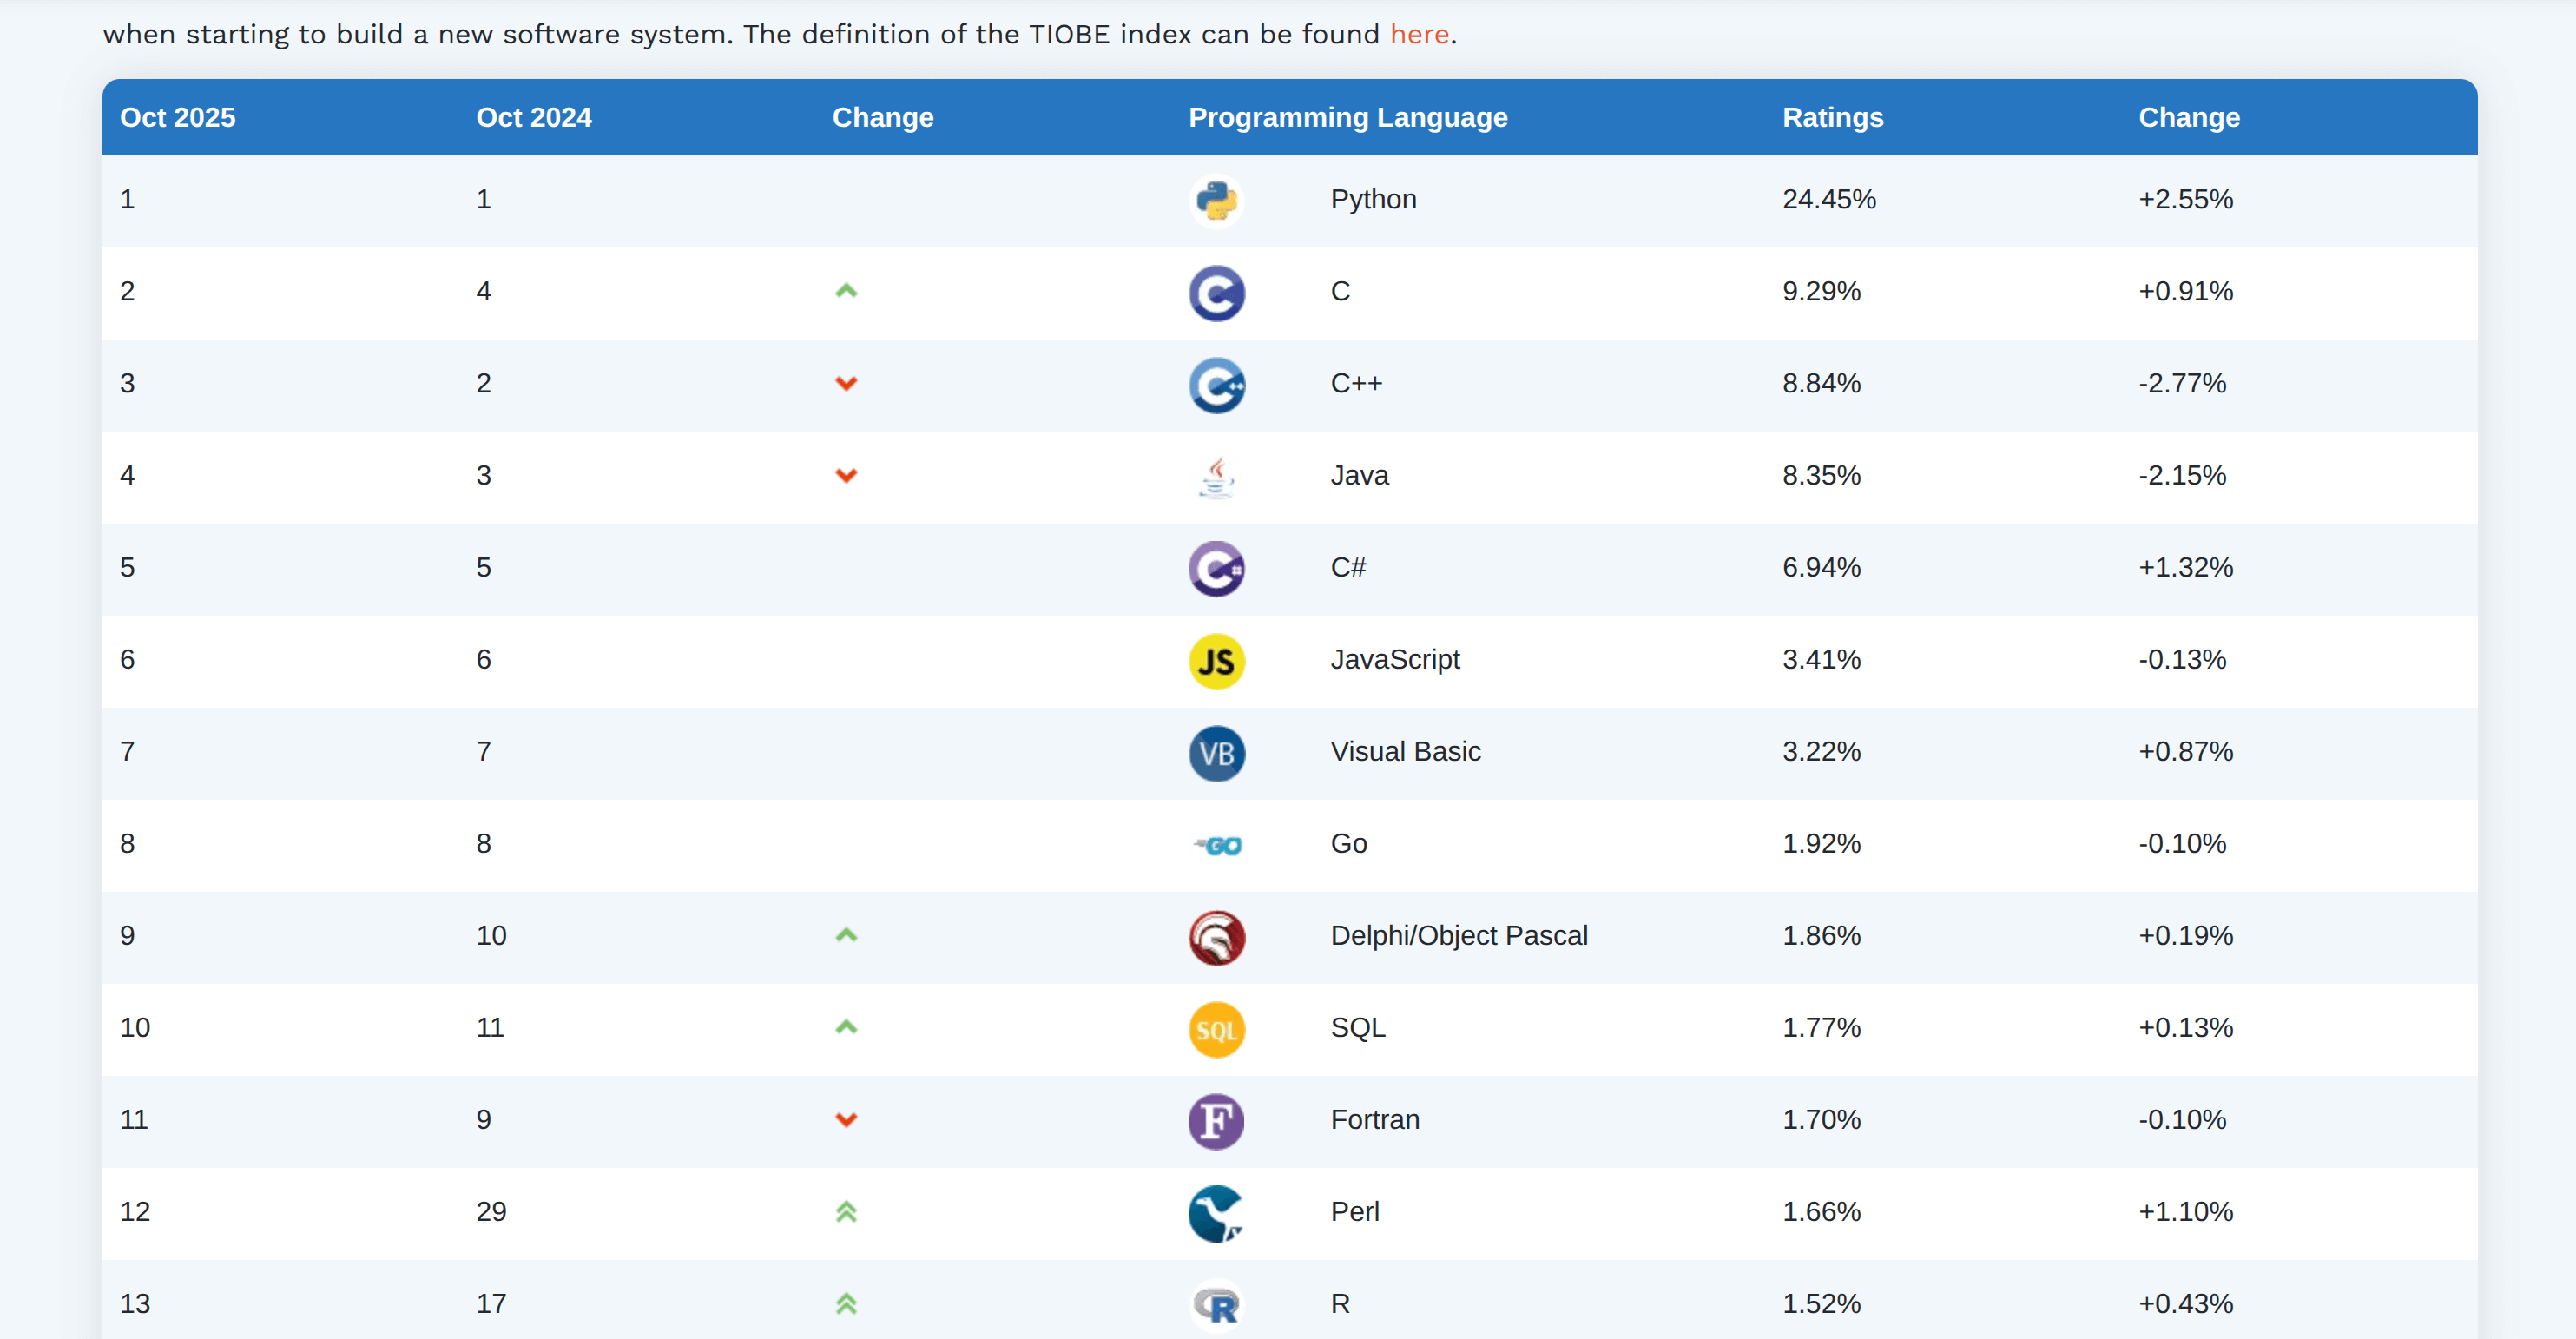
- Why is Python, one of the most popular languages in the world, so slow?
- Running Rust code on a Hugging Face server, cross-compilation.
- Understanding CUDA, using the GPU in backend projects.
- Considering the information here as a template.
Why is Python Slow?
Actually, the answer is simple: Python is an interpreted language. There is an interpreter between the machine and you, and the optimizations you can do at the language level are limited. For example, the GIL (Global Interpreter Lock), the biggest benefit of the interpreter, automates many tasks that are done manually in languages like C/C++, which provides code readability and helps you focus on the main task; but on the other hand, it prevents you from taking full advantage of the CPU’s performance. As the number of pixels in ray tracing increases, the for loops increase, and in each loop, the costs of creating objects, running the algorithm, and cleaning up memory increase exponentially. There is also something that most Python programmers have heard frequently: “In Python, almost everything is an object.”. So it’s absolutely not the same thing using data types in C++ and in Python.
So is the performance issue in Python such a hopeless case? It all depends on what we expect and what result we can be happy with. First of all, it must be admitted from the beginning that using the CPython interpreter for ray tracing is a bad choice. But as I said, instead of making a specific thing, we want to satisfy our curiosity and see what we can do when we need something similar in the future.
Let’s start with the first one, interoperability.
Python - Rust Interoperability
When I first started writing RAYT, it was pure Python, with a single CPU core, and it was terribly slow. The first solution that comes to mind is multiprocessing. But I decided to postpone this idea because of two reasons:
- I plan to test it with No-GIL, free-threading feature which coming with Python version 3.14 later.
- I was not sure that multiprocessing would give the improvement I expected.
But I was sure that interoperability would have a contribution to the performance. The only problem is that we need to learn the helper language we will choose besides Python.
So a little question at this point: Since we are going to get support from another language, why don’t we just write in that language completely? Let me remind you of my motivation from time to time. My goal is not to write a ray tracer. It has been written many times by different developers in dozens of languages. My goal is to find answers to what I can do when I have to solve a performance problem in any Python project I work on.
First, I thought about making the C++ code runnable in Python with pybind11 while the C++ code was ready. But then I thought I would spend less effort in Rust for packaging, loading dependencies, and cross-compilation.
The packaging is important, even Python could not solve this problem successfully. I know how to solve these kinds of problems myself, but if you are not familiar with the Python community, these tools will seem like chaos to you: Using pip inside Conda, poetry with pyenv or pipenv, having a pyproject.toml file but using requirements.txt to install packages… A complete chaos; but the fault is with the package managers. Anyway, I’m not going to get into this topic. uv is the best for me until something better comes along, and its Rust interoperability support is very good. After all, it is a Python tool written in Rust:
uv init --build-backend maturin rayt-rust
This magic command creates the necessary files and directory structure for you to use Rust code in Python:
rayt-rust
└── src
    └── lib.rs
    └── rayt_rust
        └── __init__.py
        └── _core.pyi
└── README.md
└── Cargo.toml
└── pyproject.toml

2 directories, 6 files
The Rust code will be in the src/ directory, and the dependencies will be written to the Cargo.toml file. That’s roughly it. When we run the uv build command, the rayt_rust package will be ready to use in Python. But there is a problem, if we go back to our motivation, our goal is not to write the whole code in Rust; just to move the performance-critical part to Rust and keep the rest in Python. There are two ways to do this:
- Prepare a separate library for performance-critical parts and install it as a dependency to the Python project.
- Host all modules in a single package.
I chose the second one for RAYT. This is the reason why there are two different directories named rayt/ and rayt_rust/ in the src/ directory. Thus, when I run the uv run one-weekend command, the Rust code is automatically built and ready to use.
However, I will also show an example of the first option on the Hugging Face page.
Using RAYT on Hugging Face Spaces
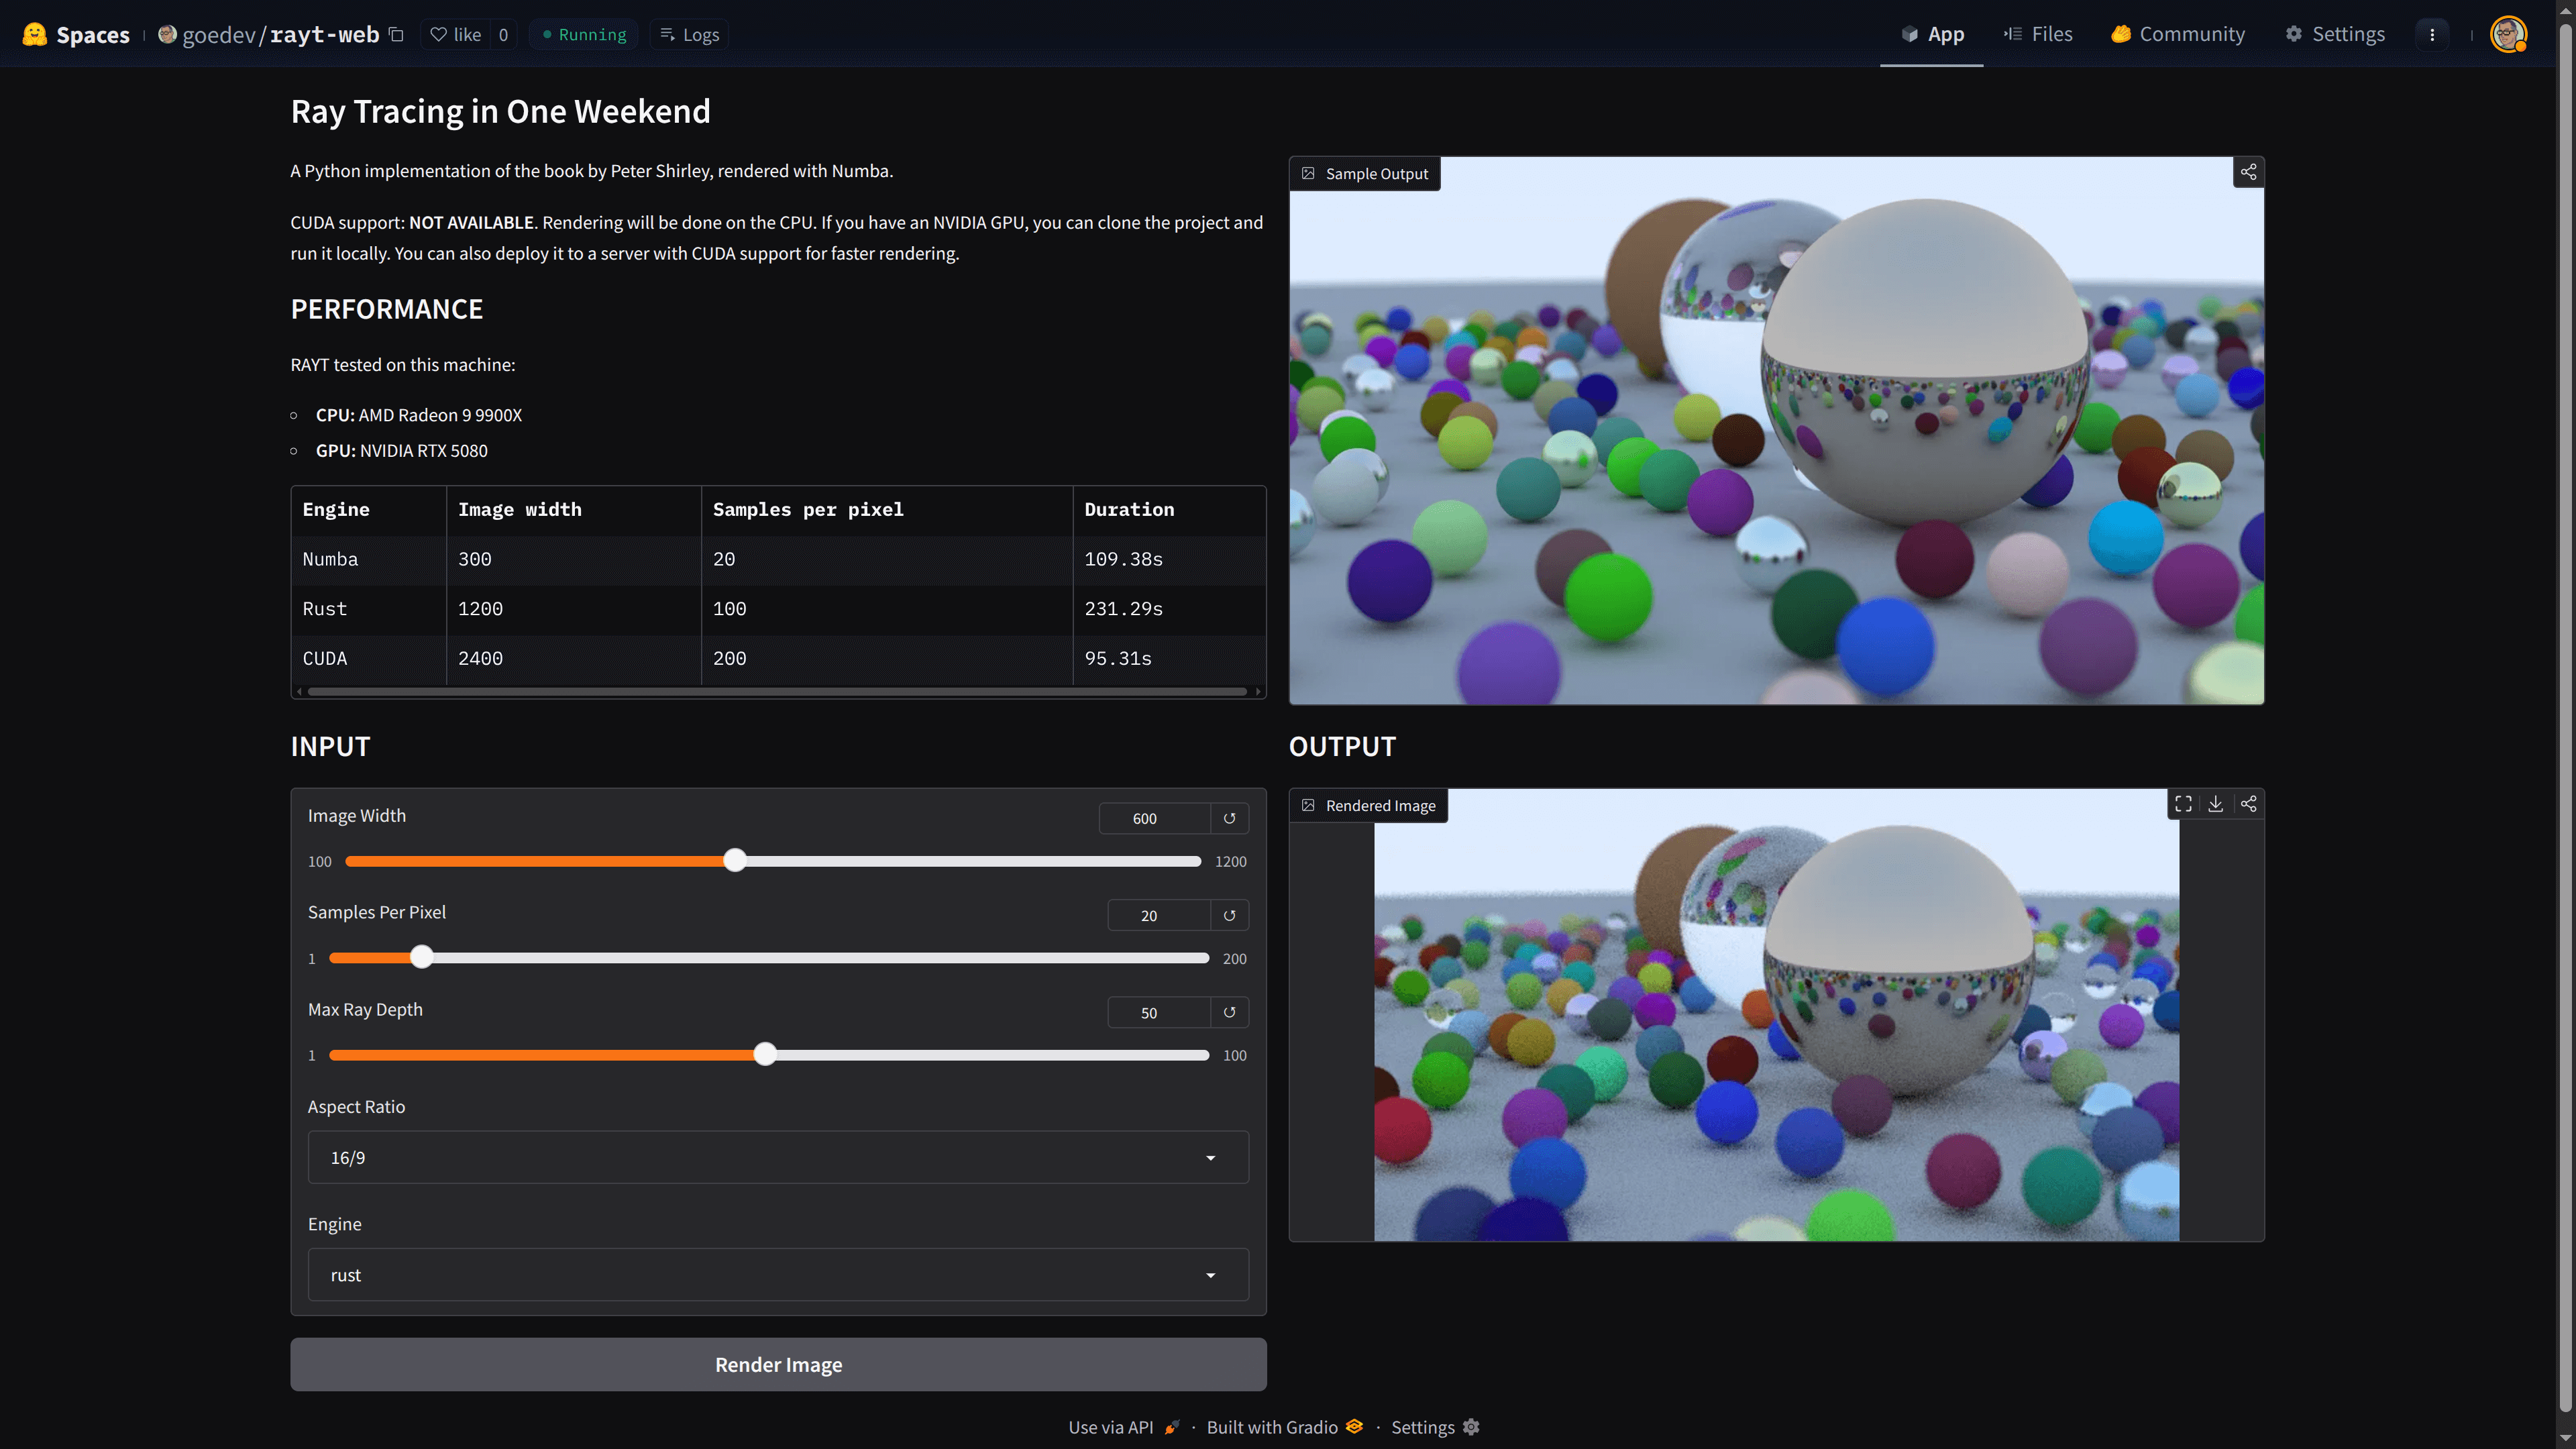
Gradio is a simple and useful Python library that allows you to prepare a web interface for ML models. Hugging Face Spaces is a service with similar practicality where you can run Gradio, with GPU support. Now let’s put the GPU part aside and run RAYT with a simple web interface. You can try the web application made with Gradio here and examine its source code. The first thing I want to draw your attention to is the requirements.txt file:
gradio
numba-cuda[cu13]
https://huggingface.co/spaces/goedev/rayt-web/resolve/main/rayt-0.1.0-cp310-abi3-manylinux_2_34_x86_64.whl
I wrote all the necessary dependencies to run both locally and on HF Spaces. RAYT has to be a link, because I think HF Spaces copies the requirements.txt file to a different directory during deployment and cannot find the .whl file. Since the repo is open to the public, so it won’t be a problem to download the wheel file publicly. This was the first solution that came to my mind, another solution is to prepare your own Dockerfile.
The second problem is that since RAYT is now a compilable library, you need to be careful about which Python version you use and for which operating system you compile. Since HF Spaces uses Python 3.10 and Linux by default, you need to prepare a development environment accordingly. Normally, to test RAYT locally, you need to install rustup (for Rust and cross-compilation) and uv (for Python), and then follow these steps:
gh repo clone gkmngrgn/rayt && cd rayt
uv build
If I remember correctly, rustup will install the necessary target according to the platform you are using when it is first installed. When you wanted to try running RAYT CLI locally, it will probably work, but you may not have the same target on your HF Spaces server, so there’s one more step. This is one of the reasons why I chose Rust for interoperability, when I think about the somersaults I did to run C++ code in WASM, I realize the comfort provided by Maturin better. Now let’s try to install the correct target and build it:
rustup target add x86_64-unknown-linux-gnu
uv tool install maturin
uvx maturin build --target x86_64-unknown-linux-gnu
ls target/wheels/
rayt-0.1.0-cp310-abi3-manylinux_2_34_x86_64.whl
Nice, Python distro is CPython, version 3.10, operating system is Linux, processor architecture is x86_64. Alles gut. Now we can use this in our web application. Since this is a simple template project, I avoid complexity as much as possible. Because the needs of each project and the preferred tools are different. Normally, this should be part of the DevOps process; when a new version is released, the build process should start on CI/CD servers, artifacts should be uploaded to a service like CodeArtifact, and web projects should be able to install packages from this service. The second thing I want to draw your attention to about the repo is the .gitattributes file:
*.parquet filter=lfs diff=lfs merge=lfs -text
*.pb filter=lfs diff=lfs merge=lfs -text
*.pickle filter=lfs diff=lfs merge=lfs -text
*.pkl filter=lfs diff=lfs merge=lfs -text
*.pt filter=lfs diff=lfs merge=lfs -text
*.pth filter=lfs diff=lfs merge=lfs -text
*.rar filter=lfs diff=lfs merge=lfs -text
*.safetensors filter=lfs diff=lfs merge=lfs -text
saved_model/**/* filter=lfs diff=lfs merge=lfs -text
*.tar.* filter=lfs diff=lfs merge=lfs -text
*.tar filter=lfs diff=lfs merge=lfs -text
*.tflite filter=lfs diff=lfs merge=lfs -text
*.tgz filter=lfs diff=lfs merge=lfs -text
*.wasm filter=lfs diff=lfs merge=lfs -text
*.xz filter=lfs diff=lfs merge=lfs -text
*.zip filter=lfs diff=lfs merge=lfs -text
*.zst filter=lfs diff=lfs merge=lfs -text
*tfevents* filter=lfs diff=lfs merge=lfs -text
*.whl filter=lfs diff=lfs merge=lfs -text
Keeping large files in the repo is not a good idea. For example, sometimes you don’t need these files to work on projects, and as the size of these files increases, cloning the repo takes unnecessary time. Git LFS, Xet, DVC are some of the tools used to solve this problem. It’s not a big problem for a 304 kb package, but it is useful to take precautions from the beginning in professional projects. So let’s take a look at how .gitattributes is created. First, you need to install git-lfs:
git lfs install
git lfs track *.whl
git add .gitattributes
From now on, when you commit and push a *.whl file, LFS will keep this file in a separate storage. Finally, We know how to use a Python library written in Rust in a web project.
Did Rust Solve RAYT’s Performance Problem?
It’s not as fast as C++, probably not even as fast as a CLI written entirely in Rust. But, it’s many times faster than Python. We can say that it has largely solved the performance problem; but what if we want to use a GPU? Both Rust interoperability and access to the GPU via Rust?? May be a good idea but I’ve no time for testing it. But it is probably possible to do that too, if there is a CUDA-supported GPU on the server, why not?
But let’s put Rust aside for now and focus on another topic. Can we take advantage of the power of the GPU by writing Python code and using CPython? I’m sure there is more than one way to do this; I tried it with Numba.
Numba and Numba CUDA
Numba is a Just-In-Time (JIT) compiler that uses the LLVM compiler library to translate Python code into optimized machine code at runtime and run it on the CPU.
CUDA (Compute Unified Device Architecture) is a platform that allows us to use the enormous processing power of NVIDIA’s graphics processing units (GPUs) for general-purpose computing, also known as GPGPU.
Numba CUDA is an additional package that translates Python code into PTX code (Parallel Thread Execution) and runs it on CUDA GPU cores.
In summary, you can think of Numba as a JIT Compiler and CUDA as a target. It includes the same basic motivation as rewriting RAYT in Rust. But you don’t need to learn another programming language to use Numba CUDA, you just need to know how the CUDA architecture works, other than that you don’t even need to do anything for GPU memory allocation/deallocation. But Numba CUDA has two disadvantages:
- JIT compilers have a waiting time for code translation and compilation on the first run. It is a negligible time when you consider the total time.
- As you can imagine, you need a graphics card, drivers, and additional packages to use CUDA.
Now let’s go back to the RAYT code and review the other options besides Rust. To prevent some code repetition, I moved some functions that I thought were critical to Numba and continued to use the Rust code for the rest, but let’s assume that there is no Rust code in it and we only used Numba, I don’t think we will need both in a real project.
Although we are only writing Python code, there are some limitations:
- We cannot use
try - except. - There is no context management (
with). - There are no generators.
- There are no comprehensions made with list, dict, set.
- Debugging is a little different than we think.
- Worst of all, typing support is limited and a bit unconventional.
But we can use NumPy and let me explain its importance as follows: You will use CPython, you will have your values defined in Python in certain data types, and you will be able to convert them to NumPy arrays and pass them as parameters to Numba functions. Likewise, you will be able to get the values returned by these functions back as NumPy arrays or send them to each other between functions. The best example to understand how I did this is the _prepare_scene_data method:
import numpy as np
import numpy.typing as npt

from rayt_rust._core import Camera, HittableList, get_color, Color
from rayt.numba_optimized import render_pixel_numba


class NumbaRenderer:
    """Numba-optimized ray tracer renderer"""

    def __init__(self) -> None:
        self.spheres_data: npt.NDArray[np.float64] | None = None
        self.materials_data: npt.NDArray[np.float64] | None = None
        self.camera_data: npt.NDArray[np.float64] | None = None

    def _prepare_scene_data(self, world: HittableList, camera: Camera) -> None:
        """Convert scene objects to NumPy arrays for Numba"""
        # Sphere data: [center_x, center_y, center_z, radius]
        self.spheres_data = np.array(world.get_sphere_data(), dtype=np.float64)

        # Material data: [type, param1, param2, param3, param4]
        # Type 0: Lambertian [type, albedo_r, albedo_g, albedo_b, unused]
        # Type 1: Metal [type, albedo_r, albedo_g, albedo_b, fuzz]
        # Type 2: Dielectric [type, ref_idx, unused, unused, unused]
        # Default to Lambertian with white color
        self.materials_data = np.array(world.get_material_data(), dtype=np.float64)

        # Camera data: [origin, lower_left_corner, horizontal, vertical, lens_radius, u, v]
        self.camera_data = np.array(camera.get_data(), dtype=np.float64)

    ...
I started by moving some performance-critical code from Rust to the JIT compiler to test this. You can try it by selecting numba as the Engine in our web project. Before you try, think about how its performance would be compared to Rust. The hint is on the same page. We are using CPU in both.
My impression is that we need to understand the requirements of the project we are working on really well and calculate the cost correctly by subjectively presenting the advantages and disadvantages of the two options. Numba also provides a performance contribution compared to pure Python, but not as much as Rust. Do we need more, do we have the knowledge, time, and capacity to do it? All should be considered.
I think the real story in Numba starts with CUDA. The first thing we need to understand while making Numba code work with CUDA is Thread Hierarchy.
Kernel and Thread Hierarchy
The most important thing that CUDA achieves at its core is that it gives us programmers the ability to start thousands of cores for repetitive tasks simultaneously, that is, parallel processing. This process roughly happens as follows:
- Moving data from RAM to VRAM. VRAM is the video random-access memory used by the graphics processing unit. The data has to be moved here first because we will have the GPU do the processing.
- Running the computation called a kernel on the GPU. We give this instruction to the CPU, and the CPU transmits it to the GPU thanks to Numba CUDA. The GPU performs the computation simultaneously using the data in VRAM, using all its cores in parallel.
- Moving the computed data back from VRAM to RAM. Since we use the CPU as the host and we always communicate through the CPU, we also need this stage.
When we say python run main.py, we are instructing the CPU to run this program. But when we want a computation to be run on the GPU, we need to define special functions that we call kernels. The kernel function in RAYT is very long, but I want to touch on a few points by trimming it here:
@cuda.jit
def render_pixels_cuda(image_width, image_height, samples_per_pixel, ...):
    i = cuda.blockIdx.x * cuda.blockDim.x + cuda.threadIdx.x
    j = cuda.blockIdx.y * cuda.blockDim.y + cuda.threadIdx.y

    if i >= image_width or j >= image_height:
        return

    ...

    # Store result (note: j is flipped for correct image orientation)
    output[image_height - 1 - j, i, 0] = pixel_color[0]
    output[image_height - 1 - j, i, 1] = pixel_color[1]
    output[image_height - 1 - j, i, 2] = pixel_color[2]
The @cuda.jit decorator allows our render_pixels_cuda kernel function to be converted to native GPU code (PTX). Then we run this function over the grid and block size parameters:
# Calculate optimal block and grid sizes
block_size = 16
grid_size = (
    (image_width + block_size - 1) // block_size,  # Point.x
    (image_height + block_size - 1) // block_size,  # Point.y
)
render_pixels_cuda[grid_size, block_size](image_width, image_height, samples_per_pixel, ...)
What are Grid and Block size? To understand this, let’s think that we are programming on a single thread and CPU. Normally, we need to calculate the ray color for each pixel of the image we want to generate:
for j in range(image_height, 0, -1):
    for i in range(image_width):
        ...
The two nested for loops actually create a grid for us. But there’s a problem here: It cannot move on to the second one before the ray color calculation at one point in this grid is finished, everything proceeds sequentially. On the other hand, we have a grid proportional to the width and length of the image we want to obtain on the GPU, even before we run the kernel function. So when the GPU runs the kernel function, the ray calculation will be ready to start at every point of the image at the same time.
I think it’s clear what we meant with grid size. Imagine an image you want to generate in your mind, and there’re separate blocks to calculate ray colors of each pixel of this image. And there’re also threads in each block, which is defined by the second parameter block_size. Don’t confuse this thread with a CPU thread, it works in a very different logic. The threads in a block perform the instruction related to a point on the grid simultaneously by dividing the data sets. Now it is clear why we don’t need a for loop to define i and j in CUDA, right?
i = cuda.blockIdx.x * cuda.blockDim.x + cuda.threadIdx.x
j = cuda.blockIdx.y * cuda.blockDim.y + cuda.threadIdx.y
Actually, this information contains an important clue about the question we asked at the beginning, “Why is Python slow?”. We are trying to have the color calculation done 307,200 times one by one, even to calculate a tiny image of 640x480 pixels. On the other hand, the GPU saves us from this bottleneck thanks to this grid structure, every block in the grid, and the threads in each block, totaling hundreds of thousands of threads. This structure is called Thread Hierarchy.
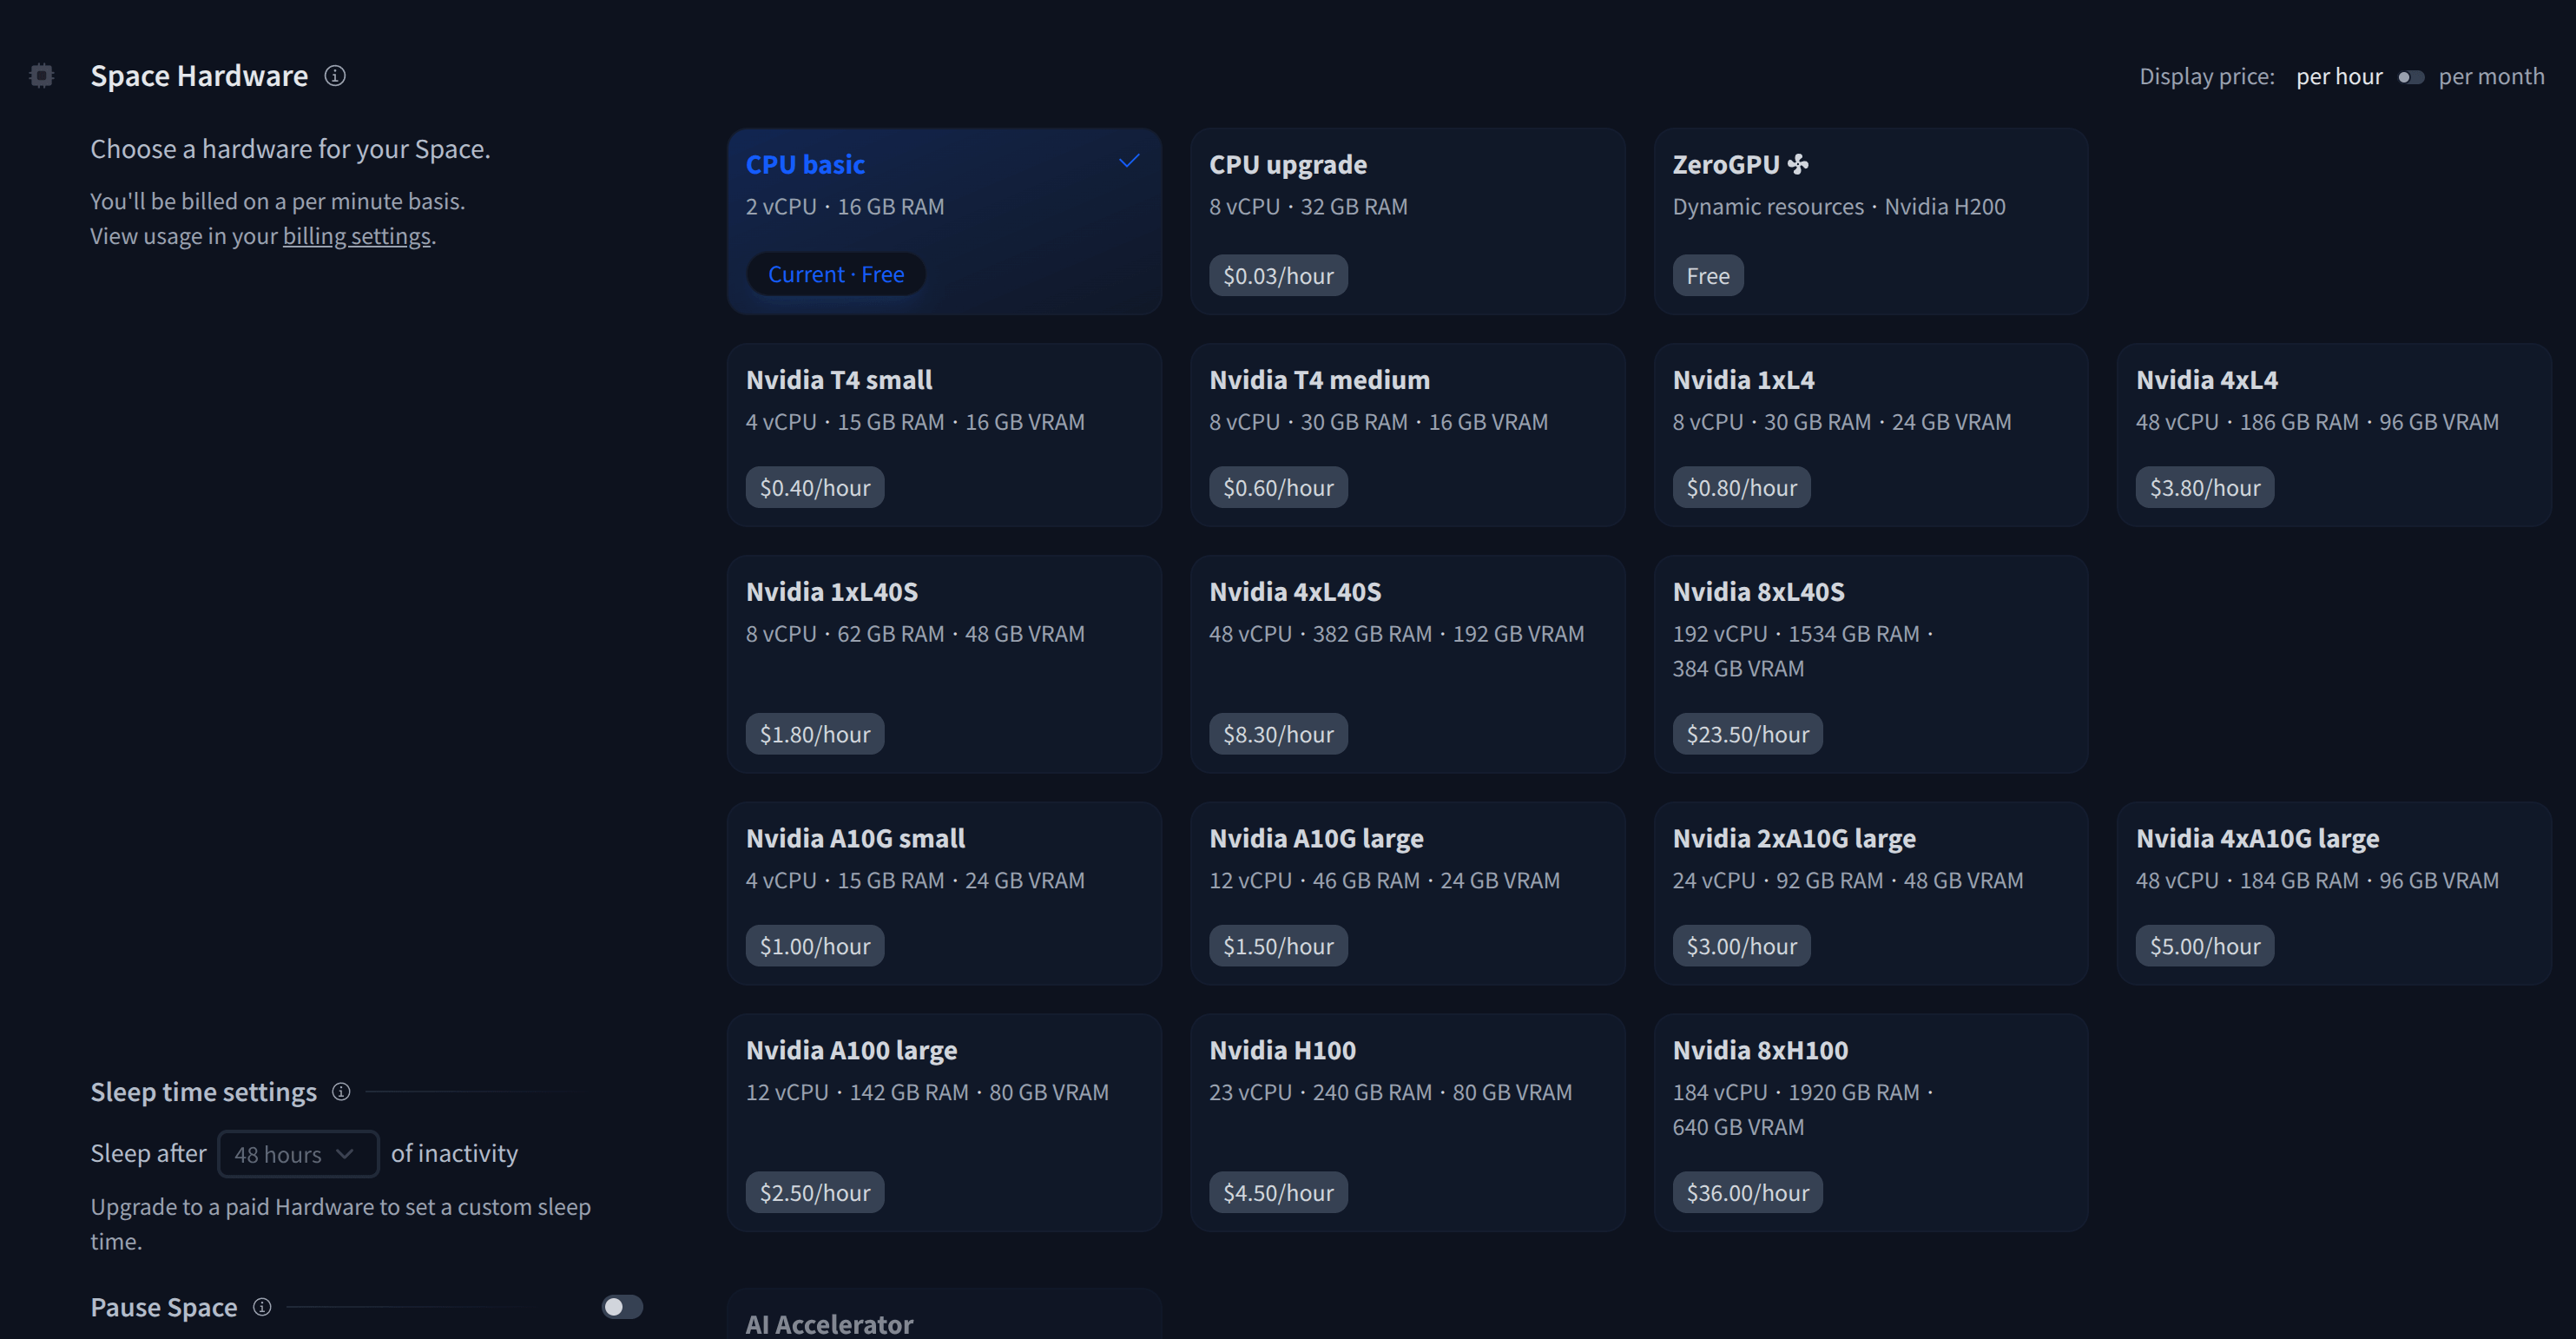
So Is It Possible To Use CUDA On Hugging Face?
Theoretically, it is possible. Practically? I haven’t tried it, but I think it’s possible. You can try it by selecting cuda as the engine in the RAYT web interface, but first you need to deploy it to a server with a GPU. But you know, it’s not free, and it’s not worth for burning money for ray tracing.
Just try it on your local machine if you have NVIDIA GPU. I don’t see any reason why it shouldn’t work after you installed the CUDA toolkit and numba-cuda packages compatible with the GPU. Then you can compare the results with different engines.
Epilogue
There was a discussion on social media about how Python became the world’s most popular language despite being a slowest language (is it?), and whether performance is important or not. The increase in GPU usage in Machine Learning and NLP jobs already explains the importance of performance, but in addition, the cost must also be taken into account. Speed and performance will always be important to me, whether with GPU and CUDA programming, with Rust/C++ interoperability, or by using Python subinterpreters or free-threading.
On the other hand, developments are progressing very fast and nobody has time to lose with languages that are difficult to learn, code, compile, and read. This is why Python is so popular.